GPIO(General Purpose Input/Output)
GPIO란 General Purpose Input/Ouput 의 줄임말로, 마이크로 컨트롤러의 핀을 입력 또는 출력 용도로 사용할 수 있게 하는 기능입니다. 기본적으로 아두이노는 5V 기준의 마이크로프로세서이며, 따라서 핀 헤더 소켓을 통해 0V 혹은 5V의 입/출력만이 가능합니다. 따라서 아두이노의 핀을 출력 모드로 설정하면 이 핀을 통해서 우리는 자유자재로 0V 혹은 5V 출력을 낼 수 있으며, 입력 모드로 설정하면 이 핀으로 들어오는 전압이 0V인지 5V인지 판단을 할 수 있습니다.
digitalWrite
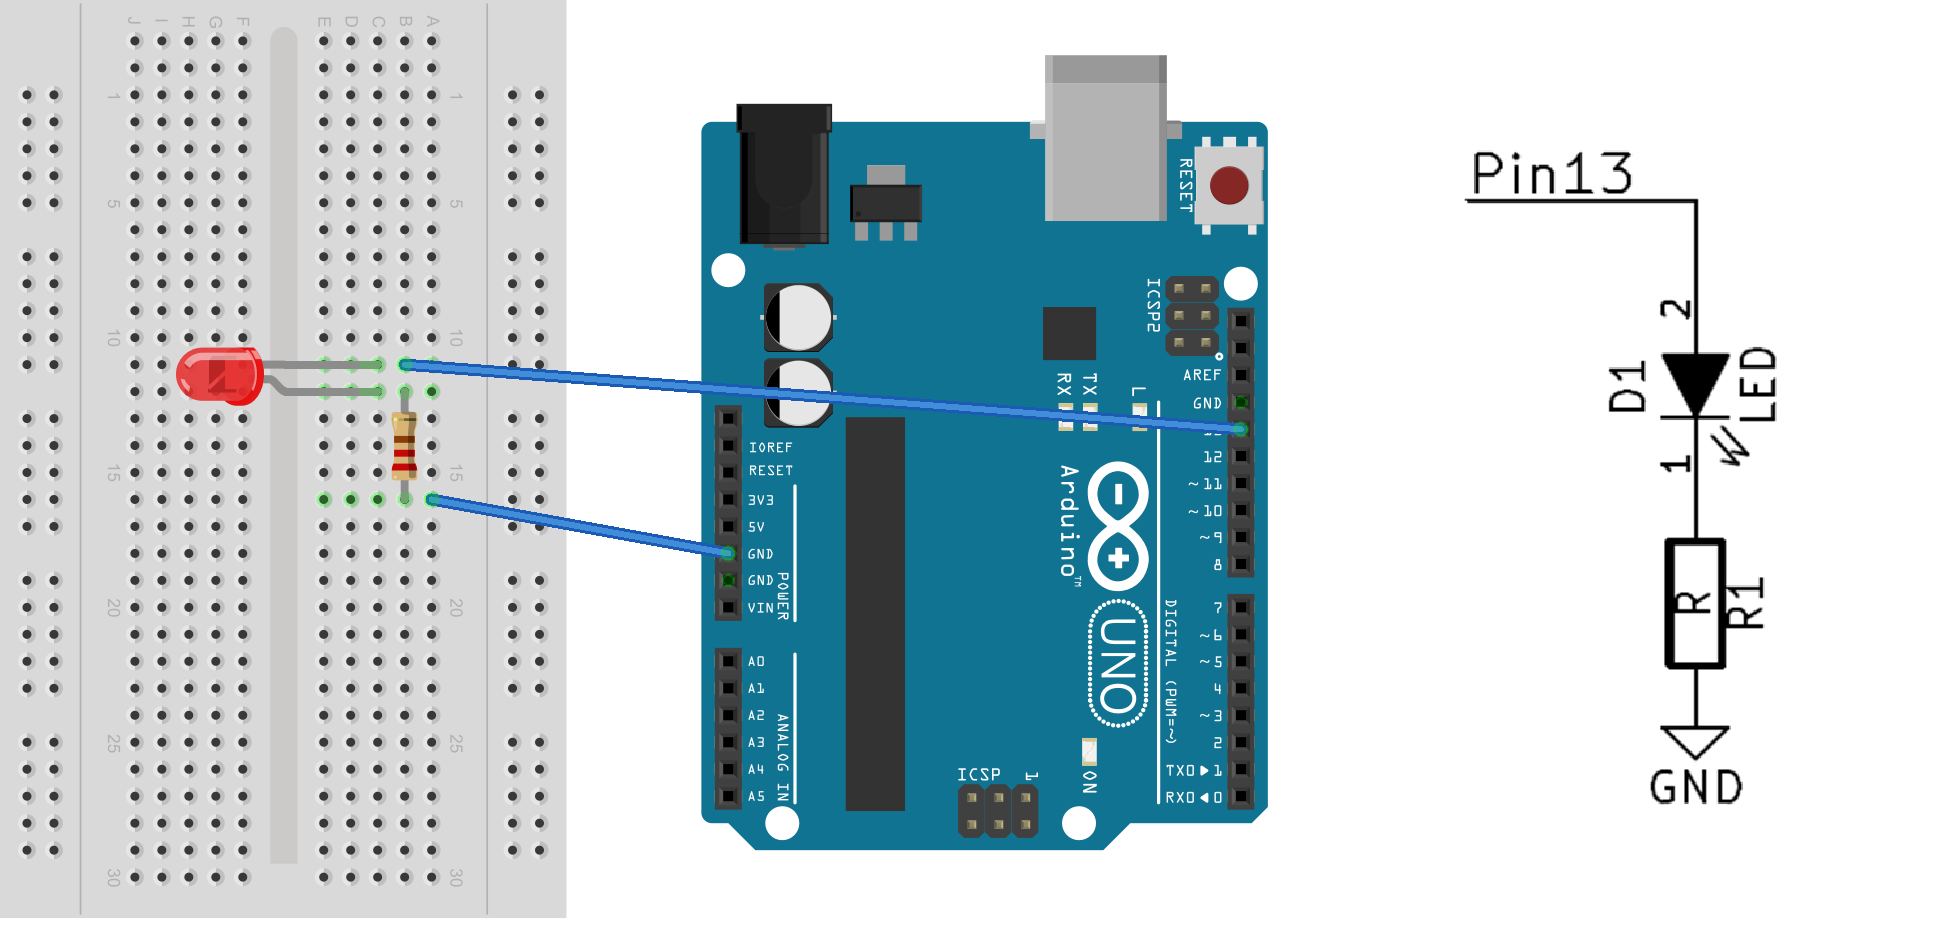
아두이노는 digitalWrite()라는 함수를 통해서 GPIO output 기능을 수행합니다. digitalWrite(pin number, HIGH)는 해당되는 핀에 5V를 출력하게 되고, digitalWrite(pin number, LOW)는 해당되는 핀에 0V를 출력하게 됩니다. 이 기능을 이용하여 일정 시간을 주기로 깜빡거리는 LED를 구현해 봅시다.
blink.ino
int ledPin = 13;                 // LED connected to digital pin 13

void setup()
{
  pinMode(ledPin, OUTPUT);      // sets the digital pin as output
}

void loop()
{
  digitalWrite(ledPin, HIGH);   // sets the LED on
  delay(1000);                  // waits for a second
  digitalWrite(ledPin, LOW);    // sets the LED off
  delay(1000);                  // waits for a second
}
digitalRead
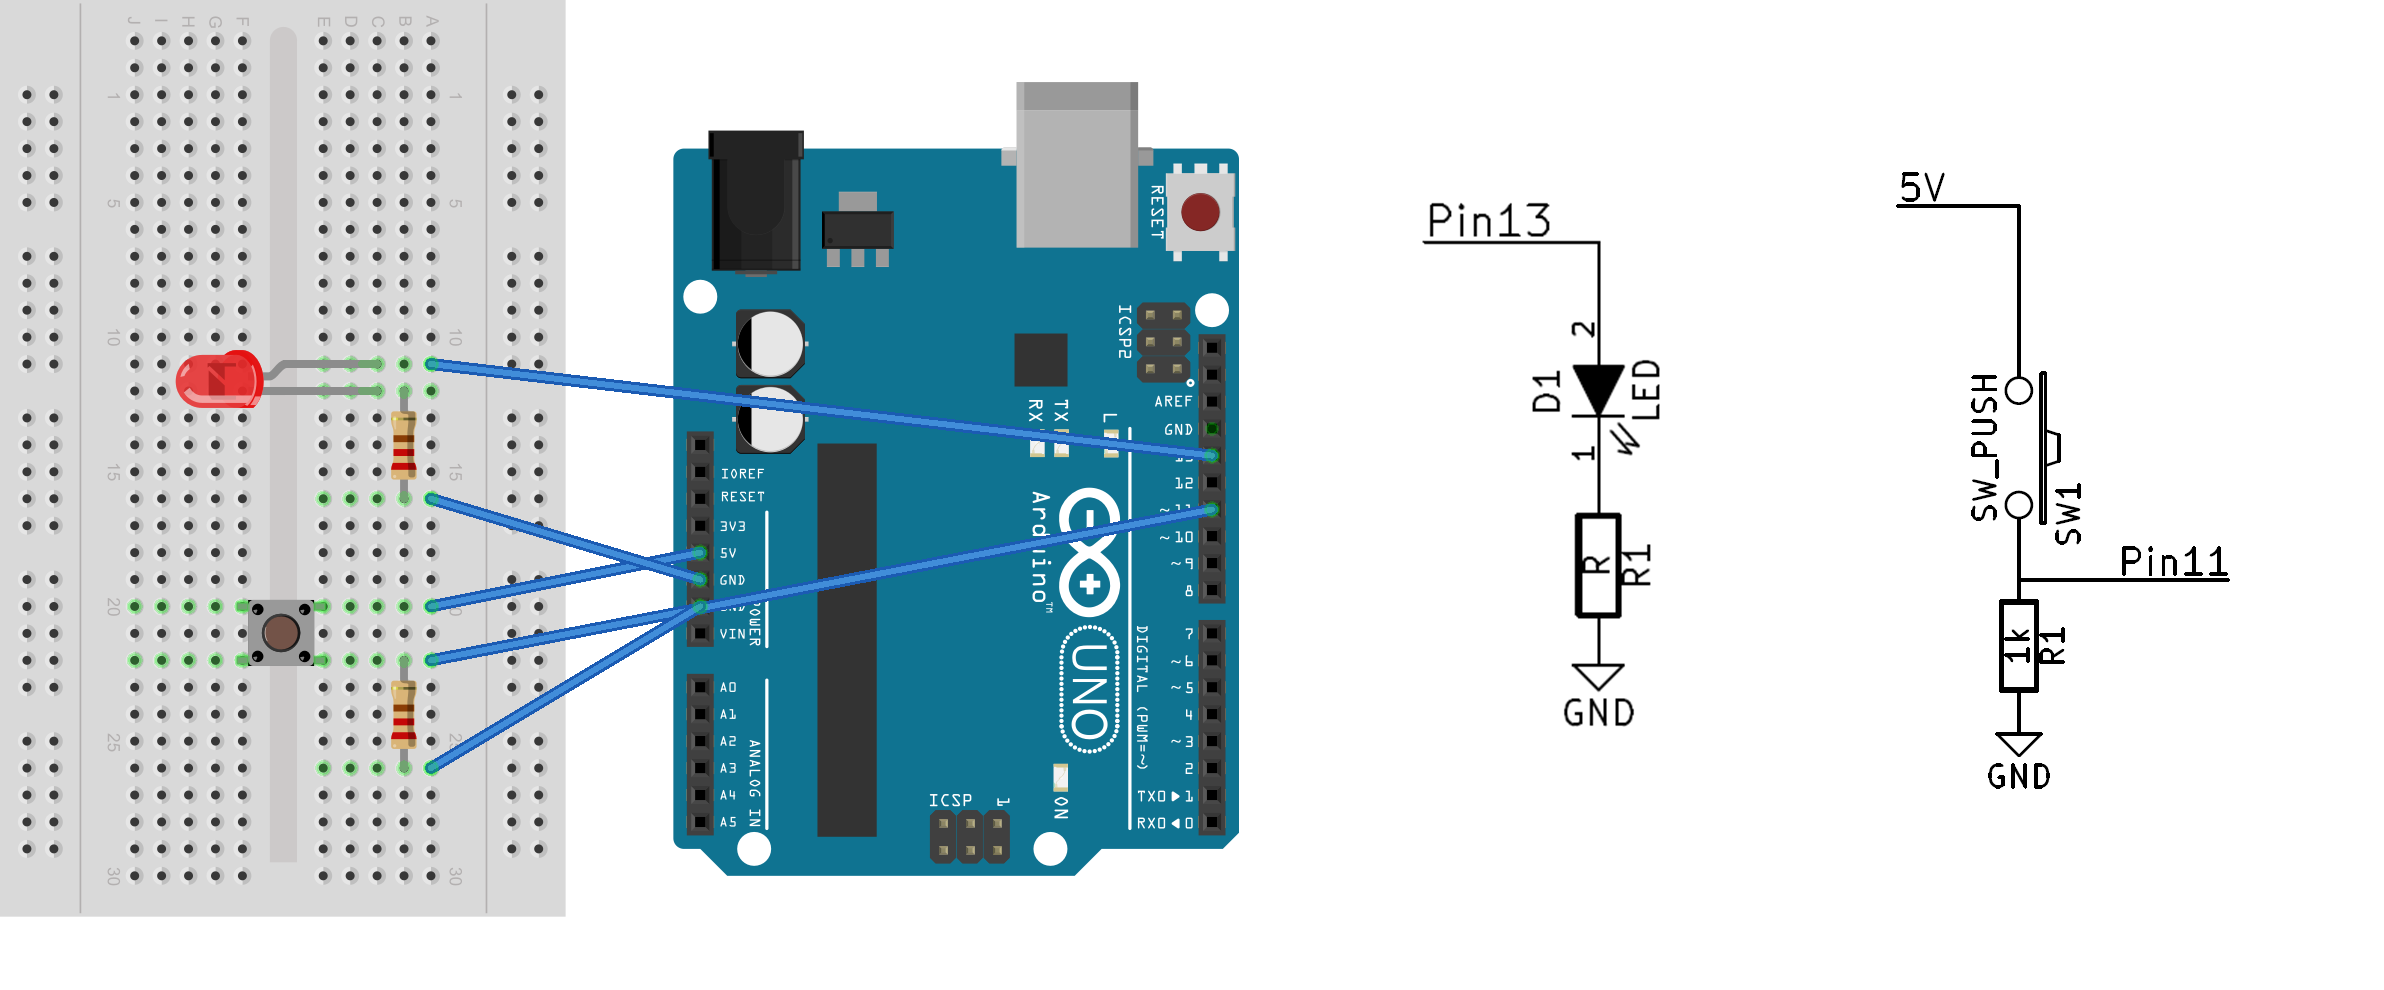
GPIO의 input 기능은 digitalRead() 함수로 구현할 수 있습니다. digitalRead(pin number) 함수는 해당되는 핀에 0V가 걸리면 정수값 0을, 5V가 걸리면 정수값 1을 반환합니다. 이 기능을 이용하여 버튼으로 제어할 수 있는 LED를 구현해 봅시다.

digitalread.ino
int ledPin = 13; // LED connected to digital pin 13
int inPin = 11;   // pushbutton connected to digital pin 11
int val = 0;     // variable to store the read value

void setup()
{
  pinMode(ledPin, OUTPUT);      // sets the digital pin 13 as output
  pinMode(inPin, INPUT);      // sets the digital pin 11 as input
}

void loop()
{
  val = digitalRead(inPin);   // read the input pin
  digitalWrite(ledPin, val);    // sets the LED to the button's value
}


